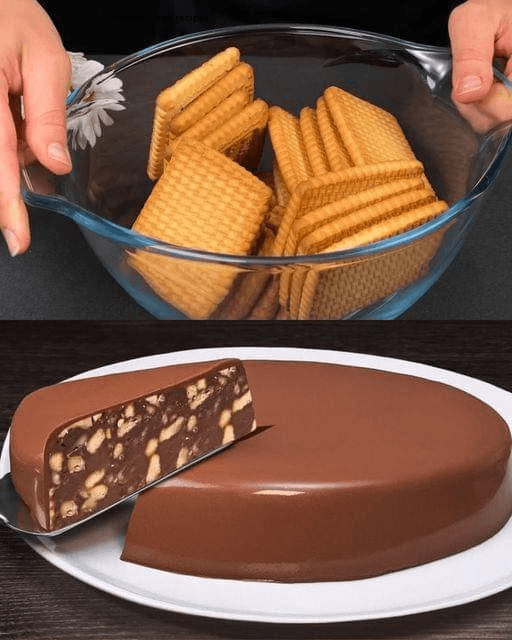
Indulge in a simple, quick, and mouth-watering dessert designed for chocolate and biscuit lovers. This no-bake recipe combines the rich, smooth flavor of chocolate with the crunchy texture of biscuits, making it an irresistible treat for any occasion. Whether you’re preparing for a gathering or simply craving a sweet, easy-to-make dessert, this cake has got you covered.
Ingredients (Serves 8-10):
- Biscuits: 200g of Maria or Digestive biscuits (feel free to use whole grain or oat biscuits for a healthier twist).
- Chocolate: 400g of dessert chocolate (you can choose dark, milk, or even white chocolate for a different flavor profile).
- Butter: 100g of unsalted butter (at room temperature).
- Cream: 200ml of heavy cream (ensure it has at least 35% fat content).
- Vanilla Extract: 1 teaspoon (optional, but adds a rich flavor).
- Nuts (optional): Chopped almonds, walnuts, or hazelnuts to add extra crunch and texture.
- For Decoration (optional): Cocoa powder, chocolate chips, or powdered sugar for sprinkling on top.
Step-by-Step Instructions:
1. Prepare the Baking Pan
Before you begin mixing the ingredients, prepare a baking pan. You can use either a round or rectangular pan, depending on the shape you want for your cake. Lightly grease the pan with butter or line it with parchment paper, which will make it easier to remove the cake once it’s set.
2. Break the Biscuits
Place the biscuits in a large bowl and break them into pieces using your hands or a rolling pin. They don’t need to be finely crushed; medium-sized chunks will provide the perfect texture for the dessert.
- Tip: If you prefer a softer cake, crush the biscuits into finer pieces for a smoother texture.
3. Melt the Chocolate and Butter
In a medium-sized saucepan, combine the 400g of chopped chocolate with the 100g of butter. Melt over low heat, stirring continuously with a spatula to prevent the chocolate from burning or sticking to the pan.
- Tip: If you prefer, you can melt the butter and chocolate together using a microwave. Heat them in 30-second intervals, stirring well after each interval, until fully melted and smooth.
4. Add Cream and Vanilla
Once the chocolate and butter mixture is smooth and melted, remove it from the heat. Pour in the 200ml of heavy cream and stir until you have a glossy, smooth mixture. Add the teaspoon of vanilla extract for a touch of aromatic flavor.
5. Combine Biscuits with the Chocolate Mixture
Pour the chocolate mixture over the broken biscuits in the bowl. Use a spatula or wooden spoon to mix until all the biscuit pieces are well-coated with the chocolate. If you are adding chopped nuts, this is the time to do so. They will give the cake an extra layer of flavor and a delightful crunch.
6. Transfer to the Pan
Once the mixture is well-mixed, transfer it to the prepared pan. Spread it evenly using a spatula, ensuring the top is smooth and compact for a neat appearance.
7. Chill and Set
Place the cake in the refrigerator for at least 3-4 hours. Ideally, let it sit overnight to achieve the perfect consistency. The cooling process will allow the chocolate to solidify, and the biscuits will absorb some of the chocolate, giving the cake a delicious texture.
8. Unmold and Decorate
When the cake is fully set and firm, carefully remove it from the pan. If you used parchment paper, this step will be a breeze. If you opted to grease the pan, use a knife to gently loosen the edges before taking the cake out.
- Optional: Decorate the top of the cake with a dusting of cocoa powder, a sprinkle of chocolate chips, or even some fresh fruit like strawberries or raspberries to add color and freshness.
9. Serve and Enjoy
Slice the cake into portions and serve it chilled. You can pair it with a scoop of vanilla ice cream or a dollop of whipped cream to make it even more delectable.
Additional Tips for Success:
- Personalization: Feel free to experiment by adding different ingredients such as crushed Oreo cookies, raisins, shredded coconut, or any of your favorite nuts. There’s no limit to what you can add to make this cake your own.
- Creamier Chocolate: If you want a richer, creamier texture, add an extra 50ml of heavy cream. This will give the cake a softer, melt-in-your-mouth consistency.
- Gluten-Free Option: For those with gluten intolerance, substitute the biscuits with gluten-free cookies. Make sure all the other ingredients you use are certified gluten-free as well.
- Storage: This cake keeps well in the fridge for 4-5 days, as long as it is covered or stored in an airtight container. If you want to make it ahead of time, you can also freeze it and thaw a few hours before serving.
Final Result:
You’ll be left with a delightful, no-bake chocolate cake that combines the crunch of biscuits with the smooth, rich flavor of chocolate. Perfect for special occasions, gatherings, or simply when you want a sweet treat without the fuss of baking. Each bite offers a burst of chocolatey goodness, balanced by the crunch of the biscuits and any added nuts. This treat will undoubtedly please anyone with a deep love for chocolate!